Categories
Photo Editing Photography

I Edited My Photo Like a Pro – You Won’t Believe the Difference!

Have you ever taken a picture that was nearly perfect except for something? Colors had been dull, lighting hadn’t worked well, or there was a desire for a different background. I used to experience exactly the same difficulties until I decided to dig deep into photo editing. And let me be honest, the transformation was mind-blowing!

In this blog post, I’m going to show you how my simple photo, step by step, transforms it into something great that would go out as an officially published document. You get some easy-yet-power editing techniques, learn which tools do I rely most, and lots of tips for taking your photos from “meh” to “WOW”!

The Original Photo: The Beginning

Let’s start first with the original photo. It was taken on a bright sunny day out of doors while using my phone. Actually, the composition was fair but all colors were quite flat, and brightness came out uneven along with unwanted distraction in the background. It had potential, but it needed a professional touch.

Selecting an Appropriate Editing Tool

First of all, one must choose the appropriate photo editing tool. With so many different software available, here are some of my favorite recommendations for various skill levels:

  • For Beginners: Snapseed, Lightroom Mobile, PicsArt
  • For Intermediate Users: Adobe Lightroom, Photoshop Express
  • For Professionals: Adobe Photoshop, Affinity Photo

Since I wanted a pro-level look, I used Adobe Lightroom and Photoshop. Lightroom is very good for color grading and lighting adjustments, and Photoshop does detailed retouching.

Step 1: Basic Corrections in Lightroom

In the first thing, I imported my photo into Lightroom and made basic corrections. It is an important step because here the foundation for a stunning edit is laid.

1. Exposure & Contrast

The photo had been slightly underexposed as it was darker than what I wanted. Here’s what I did:

  • A little increase in exposure to brighten the image.
  • Adjusted the contrast to make the dark and light areas pop.

2. White Balance & Vibrance Enhancement

I then fixed the white balance. My photo was a bit too cool, so I warmed it up by doing the following:

  • Moving the temperature slider upwards to give the image a warm glow.
  • Increasing vibrance to make colors pop without giving them an artificial look.

3. Highlights & Shadows

Adjusting highlights and shadows ensured no part of the image was either too dark or too bright:

  • Highlights: Lowered them a bit to reveal details in the brighter areas.
  • Shadows: Pushed them up to bring out details in the darker parts.

This immediately made my image much deeper and clearer!

Step 2: Advanced Color Grading

After the basic corrections, I wanted my image to look cinematic and professional. This is where color grading comes in!

1. HSL (Hue, Saturation, Luminance)

Using the HSL panel in Lightroom, I fine-tuned individual colors. Here’s what I did:

  • Made the greens slightly yellowish for a warm, dreamy effect.
  • Boosted the blues in the sky to make them more vibrant.
  • Reduced saturation in certain areas to maintain a balanced look.

2. Adding a Moody Vibe with Split Toning

Split toning allows you to add different colors to the highlights and shadows. I chose a warm golden tone for the highlights and a cool blue tint for the shadows. It was stunning!

Step 3: Retouching in Photoshop

Lightroom did its magic, but some final touches needed to be done in Photoshop.

1. Removing Unwanted Objects

There was a trash bin in the background that completely ruined the look. I used the Spot Healing Brush Tool to remove it without a trace.

2. Skin Smoothing & Face Enhancements

If you’re working on portraits, this is the magic step! Using Photoshop’s Frequency Separation Technique, I could smoothen the skin without losing the texture.

  • Removed pimples, preserving natural aspects.
  • Improved eyes a little by giving them brightness and a slight sharpness.

Step 4: Final Touches &Exporting the Image

Before saving the final edit, I did some last-minute touch-ups:

  • Added a subtle vignette to draw attention to the main subject.
  • Sharpened the image slightly to enhance clarity.
  • Resized & Exported the image in high quality for social media sharing.

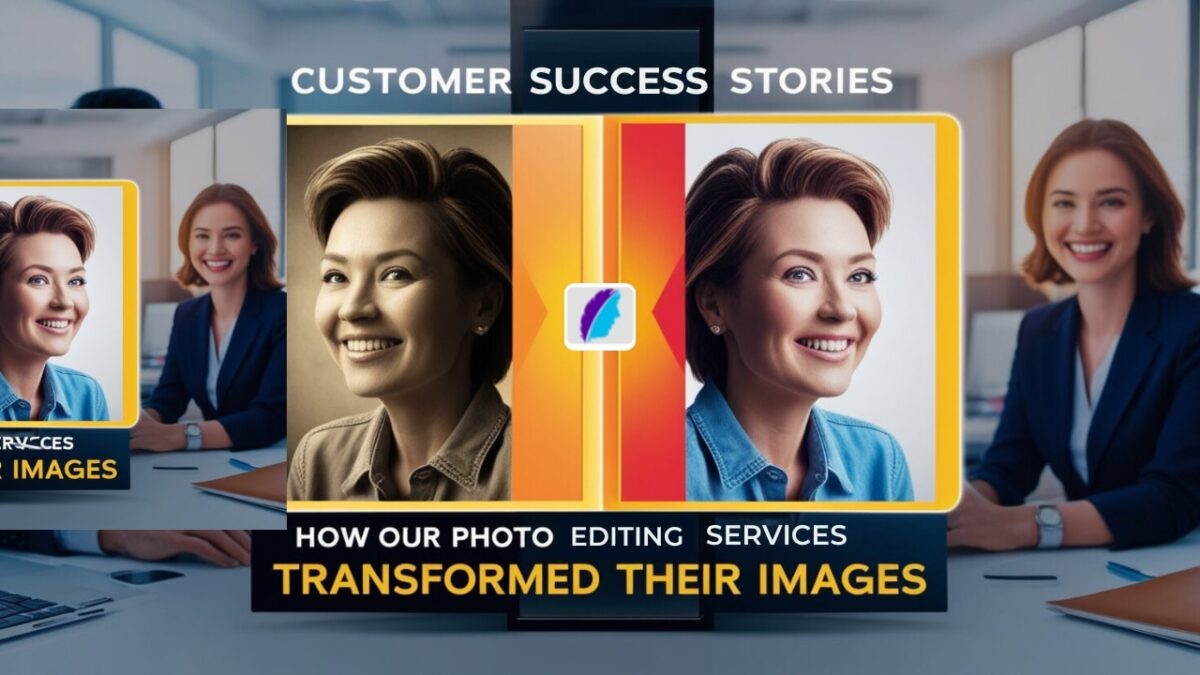
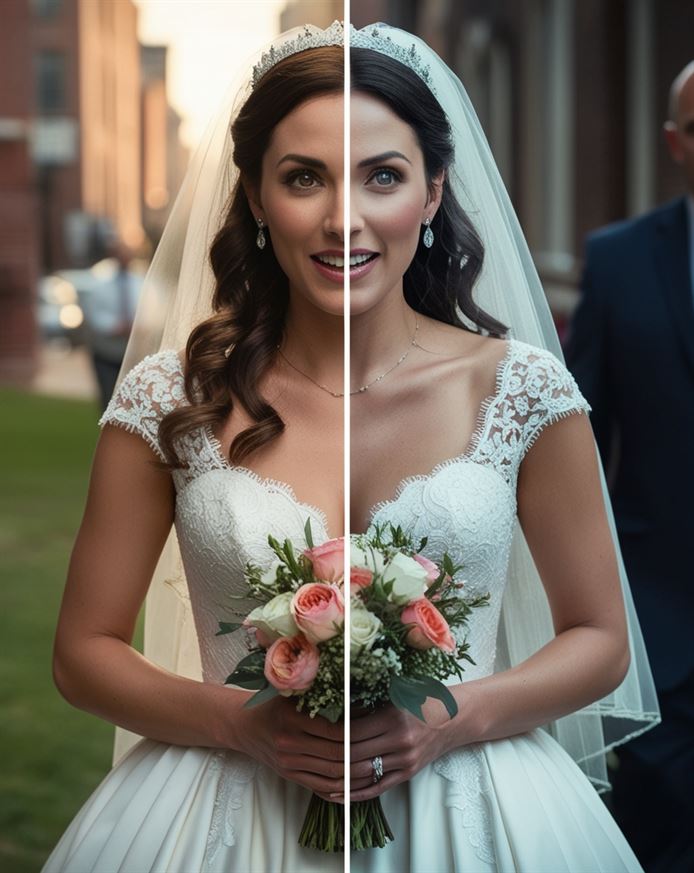
The Final Results: A Jaw-Dropping Transformation!

I compared my edited version with the original photo, and the difference was unbelievable. The colors looked rich, the composition was balanced, and the overall vibe of the image was professional and eye-catching.

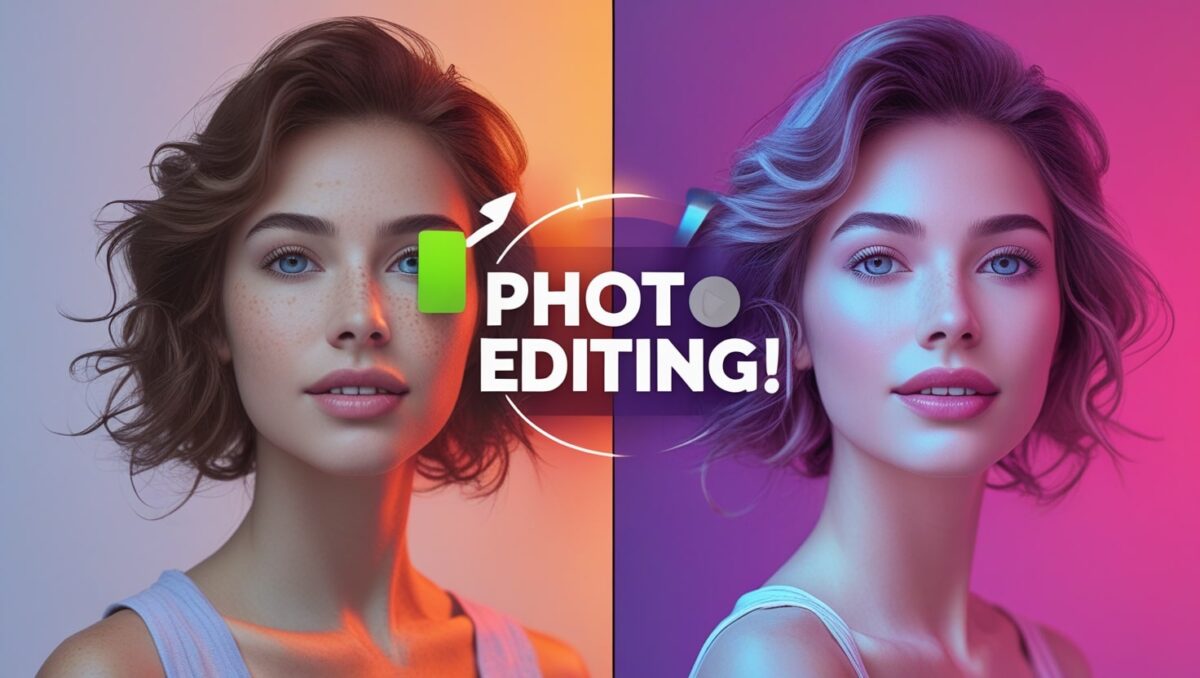
Before vs. After – What Changed?

  • Better lighting & contrast
  • More vibrant, cinematic colors
  • Clean & distraction-free background
  • Sharper details & enhanced clarity

Final Thoughts: You Can Do It Too!

Photo editing is not merely about making an image look fabulous. It’s about painting a story, bringing your personal visions to life. Whether you are an absolute beginner or someone looking to improve, the key is practice and experimentation.

Here are a few tips to get you going:

✅ Begin with the basics: Snapseed or Lightroom Mobile

✅ Watch tutorials and try recreating edits you love.

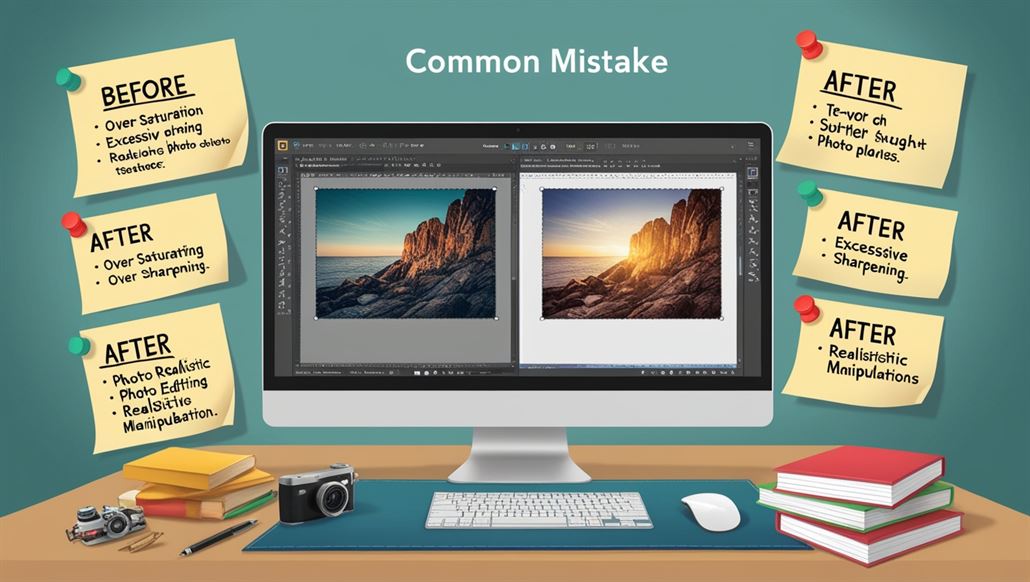
✅ Don’t overedit—keep it natural and realistic.

✅ Try color grading to develop your style.

If I could edit this photo like a pro, you can too! Try these techniques and let me know how your editing journey goes. Do you have any favorite editing tricks? Share them in the comments below! ????

Categories
Uncategorized

Best Practices for Preserving and Enhancing Vintage Photographs

Old photographs are a glimpse of history, full of feelings, and emotions, and possess stories that remain untouched. From family heirlooms to historical artifacts, each old photograph deserves to be preserved and treated with respect. In this article, both traditional conservation and modern digital techniques will be discussed and combined to enhance such vintage photographs. 

Why do we need to preserve old photographs? 

Understanding the reason why comes before ways to do so. Issues such as fading, discoloration, tears, and even mold can ruin the photograph. Moreover, vintage photos are fragile and become prone to damage due to the environment. The more proactive steps you take to preserve, restore, and protect these treasures, the less their value fades, both historical and emotional. 

1. Always Wear Gloves 

The first step towards preserving these photographs is protecting them from your bare hands. Hands can carry dirt and oils that can damage the surface of images. Always carry clean, lint-free cotton gloves or nitrile when dealing with old photographs.

  • Maintain Minimal Contact: Please grasp photographs by the corners as much as possible to avoid touching the image area.
  • Use Clean Workplaces: Make sure the workspace is properly organized and does not have any dust, food, or liquids that are capable of damaging the photographs.

2. Proper Storage is Crucial 

Make sure photographs are stored in a way that boosts their lasting power. To achieve this, use the following storage pointers: 

  1. Materials Without Acids: Use acid-free folders, sleeves, or containers to store photographs. The use of acidic materials will lead to photographs turning yellow and degrading after some time.
  1. No PVC Sleeves: It is best to avoid polyvinyl chloride as it can emit toxic substances. Instead, use sleeves made from polyester, polypropylene, or polyethylene. 
  1. Regulate Temperature and Moisture: It is essential to keep photographs in a cool and dry environment, ideally temperatures of 65°F with a relative humidity of 30-40%. Avoid putting them in attics, basements, or areas of excess moisture as this can damage photographs. 
  1. Use Dark Container: The use of light over long periods of time will cause discoloration, which is especially true for sunlight. Keep photographs in dark boxes or photographs that are of archival quality. 

3. Converting to Digital Will Last Longer

Making digital copies of photographs is one of the most efficient methods of keeping photographs safe. This will not only preserve the pictures, but it will also allow for easier sharing and restoration.

  • Employ a Good Scanner: Scanning photographs should be done with a minimum of 600 DPI scanners that capture great details. That way, the digital copy is as close as possible to the original.
  • Save in Different Formats: Lossy compression formats such as TIFF or PNG should be used while saving for archiving purposes. JPEG formats are best for transmission but they get a little damaged over some time.
  • Safeguard Your Files: Copy those digital files to external hard drives apart from using the cloud and store them in two places to avoid losing data.

4. Damaged Image Enhancing

With time, vintage photos may be subjected to cracking, tearing, or color fading. Though the damage may not be repairable in some aspects, there are ways by which these images can be enhanced:

Non-Modern Restoration Techniques

  • Art Conservation: If the photo is highly valuable or delicate, you may want to contact a professional conservator since they will guide you appropriately. They will fix tears, clean undetectable spots, and support the photo without damaging any part of it.
  • Dusting: If the photos need a bit of cleaning along the edges, use a soft brush or a microfiber hair towel to reduce damage. Never use water or cleaning solvents unless you have been asked by a professional.

Techniques for Digital Restoration

Restoring old photographs has been made simpler through the use of advanced tools such as Adobe Photoshop, or GIMP, which is free of charge. Below is the procedure:

  • Fix scratches and tears: little rips and scratches can be repaired with the clone stamp and healing brush.
  • Adjust for color loss: brightness, contrast, and color balance might need to be amplified in faded pictures.
  • Edit out stains: stains and dents can be erased through a retouching process.
  • Sharpen: details of blurred or soft parts should be enhanced.

For those looking for professional assistance, photo restoration services can provide expert care to bring your vintage photos back to life.

5. Enhancing Photos of the Past

To further enhance the quality of photographs after preserving them, there are numerous techniques and methods available for you to try.

  1. Add color to black and white photographs: AI-powered tools can paint black and white images in color, making them vivid.
  1. Crop or straighten: images that have unnecessary subjects or tilt should be cropped or straightened to improve composition.
  1. Insert metadata: to allow future generations to learn about the photograph, supplementary information like the location or name of a person depicted in it can be added.

6. Storing Vintage Photos

If your purpose is to store and later showcase vintage photos, understand that certain precautions must be put in place so they are not harmed:

  • Use UV-Protected Frames: When framing photos, consider using UV-proviglare glasses so that the pictures do not fade when exposed to light.
  • Avoid Direct Sunlight: Ensure the photos are placed in portions of the room that are away from sunshine and strong lighting.
  • Rotate Displays Periodically: Photos that are mounted in wall frames should be rotated from time to time to lessen the effects of prolonged light and other environmental influences.

7. Share the Stories

When it comes to actively preserving vintage photographs, it is not solely about the images, but about the stories behind each photo as well. Make it a point to maintain the lineage of the photo:

  • Interview Family Members: People, places, and events depicted in the pictures can be greatly enhanced by talking to family members.
  • Create Captions: Write captions or comments that explain the photographs in the digital files or provide context in physical albums.
  • Share them into the Void: Online mediums or family websites can be used to pass on images and legends about the photos for large relatives and generations to come.

8. Common Mistakes and Issues

Sometimes modern-day expectations make it extremely easy to make mistakes when it comes to preserving older vintage photographs without the correct intentions. There are many mistakes that should be avoided:

  • Using Tape or Adhesives: Do not utilize tapes, glues, or adhesive mounting systems onto older vintage photographs for any purpose. They have the potential to cause irreversible damage.
  • Overcleaning: Having an aggressive approach to the matter can damage fragile surfaces by either scratching or tearing in the process. Always deal with caution.
  • Ignoring Environmental Reasons: Ensure that storing photos does not occur in areas that are characterized by extreme heat, high levels of humidity, or too much light.

Final Remarks

The act of preserving and improving old photographs is an art and one that demands a lot of love, care, detail, and time. With the most fundamental guidelines, it is possible to maintain these historic treasures in an appropriate condition for use in the future so that the memories they contain are preserved. Whether you’re digitizing them, restoring them to their original states, or simply securing their place in a safe file, every action will help protect the terrific glory captured in the images and their memories and tales as well.

Never forget that, vintage photographs are much more than paper and ink – they are a means of getting connected to the past. Hence, to the events and people responsible for making your life worthwhile. Therefore, such photographs deserve the utmost respect. If treated well, the peaceful bond can tell its stories for generations to come.

Categories
Social Media

The Future of Visual Content in Social Media Strategy

The social media landscape is evolving at breakneck speed, and one thing has become abundantly clear—visual content is leading the charge. For marketers, small business owners, and content creators, staying ahead of the trends around visual content isn’t optional; it’s essential. This blog will explore how visual media is shaping social media engagement, the tools you need to create compelling visuals and strategies for integrating visuals into your campaigns while staying SEO-friendly.

By the end, you’ll not only recognize the power of visual content in building connections but also walk away with actionable steps to future-proof your social media strategy.

Why Visual Content is Critical in Social Media Strategy

Ask yourself, what catches your eye first when scrolling through social media? It’s almost always photos, videos, GIFs, or infographics. That’s no accident. Visual content dominates because it conveys information quickly and captures attention in ways that text alone cannot.

Studies show that social media posts with visuals are 94% more likely to be seen and shared than those without. Platforms like Instagram, TikTok, and Pinterest thrive solely because of their visual appeal. Even historically text-dominant platforms like LinkedIn and Twitter have prioritized image and video integration to boost engagement rates. Digital marketers know this, which is why producing high-quality visual content has transformed from a “nice-to-have” strategy to a must-have.

The Role of Visual Content in Driving Social Media Engagement

Visual content doesn’t just attract attention; it’s the glue that holds it. Here are some of the ways that visuals drive engagement:

1. Faster Communication of Ideas

Humans process visuals 60,000 times faster than text. A single well-crafted infographic can communicate what would require dozens of paragraphs to explain.

2. Emotional Connection

Visuals strike emotional chords, whether it’s through relatable memes or heartfelt storytelling in a video format. This kind of emotional hook is key to creating resonance, which leads to shares and comments.

3. Enhanced Reach and Performance

Posts with images receive more likes and retweets on Twitter, while videos consistently outperform other types of content across platforms like Facebook and Instagram. Live videos, in particular, receive six times as much engagement as pre-recorded ones on Facebook.

Pro-Tip:

Pair visual content with actionable captions and call-to-actions to maximize its impact. For instance, “Save this post for later!” or “Tag a friend who needs to see this!”

Staying ahead of the curve means understanding the emerging trends defining tomorrow’s social media strategies. Here are the key trends to watch:

1. Augmented Reality (AR) and Virtual Reality (VR)

Captivating experiences like AR filters (think Instagram or Snapchat filters) are increasingly popular. Brands use them to engage users in creative and highly interactive ways. Meanwhile, VR provides immersive storytelling experiences that allow users to engage with brands on a deeper level.

Example:

Sephora’s Virtual Artist lets users try on makeup using augmented reality, leading to skyrocketing online sales.

2. The Rise of Live Video

Live video isn’t just a trend—it’s become a central storytelling tool. Whether it’s for showcasing a behind-the-scenes look, a real-time Q&A, or launching a product, live streaming creates authenticity and immediacy.

3. Short-Form Video Content

With TikTok’s meteoric rise and Instagram’s Reels feature, short, engaging videos under a minute reign supreme. These quick bursts of content cater to limited attention spans while providing maximum impact.

4. Personalization Through AI

AI technology is enabling personalized visuals for brands. Features like dynamic ad creatives allow businesses to tailor visual content to specific user demographics.

Tools to Elevate Your Visual Content Game

You don’t need a big budget to create professional-grade visuals. Small businesses and content creators now have access to powerful, cost-effective tools:

  • Canva: A beginner-friendly platform for designing graphics, infographics, and simple videos.
  • Lumen5: Turns blog posts into engaging videos within minutes.
  • Adobe Spark: A versatile tool for creating social media posts and short video clips.
  • Mojo: Specializes in creating dynamic Instagram Stories and Reels.
  • CapCut: A free yet robust video editor for TikTok creators.

Strategies to Integrate Visual Content into Campaigns

Without a clear plan, even the best content can fall flat. Use these strategies to integrate visual content effectively into your campaigns:

1. Align Visuals with Your Brand Identity

Ensure that colors, fonts, and overall aesthetic are consistent across all visuals. This creates brand recognition and trust.

2. Create a Content Calendar

Map out what visuals you will post, where, and when. This helps maintain consistency and align visuals with broader campaigns.

3. Repurpose Content

A single piece of content can be repurposed into multiple formats. Turn a video into short clips, convert blog data into an infographic, or create a carousel post from a longer article.

4. Prioritize Platform-Specific Formats

A 1080x1080px square post might work great on Instagram, but TikTok thrives on vertical formats. Tailor your visuals to the platform where they’ll live.

5. A/B Test Your Visuals

Experiment with different types of visuals to identify which work best with your audience. Maybe your followers engage more with illustrative infographics than photos.

Future of SEO and Visual Content

Visual content isn’t just for social media; it plays an essential role in SEO, too. Modern SEO means making sure your visual content is discoverable by search engines. Here’s how:

  • Image Alt Text: Use descriptive alt text for images so search engines understand their content.
  • File Compression: Optimize the size of visuals for faster page load times.
  • Keyword-Based Filenames: Name your files using relevant keywords, e.g., “social-media-visual-content.jpg.”
  • Video Transcripts: Provide transcripts for videos to improve accessibility and SEO simultaneously.

With these best practices, your visuals can help you rank higher and drive more organic traffic.

Case Studies: Visual Content Done Right

1. Nike (User-Generated Content)

Nike’s user-generated #JustDoIt campaign showcases athletes and fans alike, creating endless authentic visual content while driving immense audience participation.

2. National Geographic (Instagram Storytelling)

National Geographic combines stunning photography with captions that captivate audiences, often using Instagram Stories to give behind-the-scenes glimpses into wildlife adventures.

3. Spotify Wrapped (Interactive Visual Experiences)

Spotify dominates social sharing every year with its personalized Wrapped playlists. The visually engaging reports encourage millions of users to share on their own social channels.

Why Visual Content Matters More Than Ever

Visual content isn’t just the future—it’s the now. Whether through AR, live video, or personalized posts, brands that prioritize visual storytelling are setting themselves apart in a crowded digital marketplace.

The good news? With the right tools, strategies, and willingness to experiment, anyone—from seasoned marketers to small business owners or first-time creators—can harness the power of visuals. What will you create next?

Are you ready to revamp your social media strategy with visual content at its heart? Share your favorite visual trends in the comments, and don’t forget to bookmark this guide!

Categories
Digital Marketing

How Photo Editing is Shaping Digital Marketing Success

High-quality visuals are no longer a nice to have in digital marketing—they’re an absolute must. With consumers scrolling through countless images daily, your visuals need to grab attention, tell a story, and align seamlessly with your brand. This is where photo editing comes into play.

Photo editing has become a game-changer in digital marketing strategies, influencing user engagement, brand perception, and even SEO performance. Whether you’re a digital marketer aiming to up your content game, a small business owner navigating social media, or a photography enthusiast exploring marketing trends, this guide will show you how photo editing is shaping the future of digital marketing success.

The Impact of Photo Editing on Digital Marketing

Photo editing is no longer just for professional photographers—marketers across industries are now leveraging it to stand out in a crowded digital landscape. Here’s how:

High-Quality Images Drive Engagement

A well-edited image can stop someone mid-scroll. Research shows that high-quality visuals increase user engagement significantly. Users are more likely to click, share, and interact with content featuring polished and visually appealing images. For instance:

  • Social media posts with compelling visuals receive 94% more views than those without.
  • Well-optimized product images can increase online sales by as much as 58%.
  • Articles with photos get 2x more shares on social platforms than those without.

Case Studies That Prove Photo Editing Works

  1. Airbnb’s Photographic Formula for Success 

  Airbnb reports that photos are the first thing users notice when browsing listings. To stand out, the company spends significant resources on professionally edited images for its property profiles. The result? Listings with polished pictures see increased bookings by 26%.

  1. E-commerce Giants Like ASOS and Amazon 

  These brands understand that a clutter-free, well-lit product photograph converts better. They’ve invested in high-quality photo editing to eliminate distractions while highlighting product features, resulting in higher click-through and conversion rates.

Photo editing isn’t just about aesthetics—it’s about delivering the right message to the audience in a way that resonates.

The Evolution of Photo Editing Tools

The evolution from manual Photoshop retouching to AI-assisted editing tools has made photo editing more accessible and efficient than ever.

  • Adobe Photoshop & Lightroom – Industry leaders offering advanced control over lighting, textures, and layers.
  • Canva – The user-friendly design tool popular with marketers for quick edits and creative templates.
  • Snapseed – Google’s free editing app, perfect for quick touch-ups.
  • Fotor – An AI-powered platform for photo enhancement with professional-grade tools.
  1. AI-Powered Tools 

  AI advancements allow platforms to detect backgrounds, suggest enhancements, and even alter expressions. Tools like Luminar AI are leading this revolution, making editing as simple as clicking a button.

  1. 3D Photo Editing 

  Interactive and immersive visual content is the future, and 3D photo editing tools like Blender open doors to create dynamic content that leaves a lasting impression.

  1. Mobile-First Editing 

  With the rise of mobile marketing platforms like Instagram and TikTok, editing apps have shifted toward mobile-first functionality, ensuring creators can make professional edits while on the go.

Best Practices for Photo Editing in Digital Marketing

Knowing how to edit isn’t enough—you also need strategies for making your images work harder for your campaigns.

Enhance Digital Marketing Strategies

  • Keep It Simple 

  Over-editing can make photos look unrealistic. The goal is to enhance, not distort.

  • Use Consistent Filters and Style 

  Consistency in visuals is key to reinforcing your brand’s identity. For example, brands like @AloYoga maintain a clean, neutral color palette across all their social media platforms.

  • Prioritize Lighting and Composition 

  Ensure there’s proper lighting in every image. For e-commerce businesses, stark white backgrounds remain unbeatable.

Maintain Brand Consistency

Your photos should align with your overall branding. This means using the same colors, tones, and styles that dominate your website, social platforms, and print campaigns. A consistent approach makes your business instantly recognizable.

Photo Editing for Small Business Owners

Think photo editing is reserved for businesses with big budgets? Not true. Even small businesses can achieve professional results with a little creativity and the right tools.

Cost-Effective Editing Strategies

  1. DIY Editing Apps – Use free tools like Canva or Snapseed to polish your photos without spending a fortune.
  2. Outsource Expertise – Platforms like Fiverr make professional editing affordable by connecting you with freelance editors.
  3. Batch-Edit – Streamline your workflow by editing multiple photos at once to save time and effort.

The Social Media Advantage 

For small businesses, social media marketing is a lifeline. Polished images help build credibility, catch attention, and boost engagement metrics. For instance:

  • Before and After Edits – Create an interactive post showing before and after shots to demonstrate value.
  • User-Generated Content – Lightly edit your followers’ images and repost them to engage with your audience authentically.

SEO Benefits of Optimized Images

Photo editing isn’t just about improving visuals—it’s also a secret weapon for SEO.

Photo Editing’s Role in SEO

  • Reduced File Sizes – Compress and optimize images to reduce page loading time, which is a key factor in search engine rankings.
  • Alt Text Optimization – Use descriptive keywords in alt text to help search engines understand the content and boost visibility.
  • Consistent Naming Conventions – Rename image files (e.g., “handcrafted-coffee-mug.jpg” instead of “IMG0001”) using target keywords to improve search rankings.

SEO Image Optimization Tips

  1. Use JPEG for smaller file sizes and PNG for graphics.
  2. Stick to dimensions that won’t slow down page speed.
  3. Choose software like TinyPNG to compress images without losing quality.

Shaping the Future of Digital Success with Photo Editing

Photo editing is no longer just a supporting player in the world of digital marketing—it’s a key component driving success. From engaging social media visuals to SEO-optimized website imagery, photo editing ensures your content is not only visually appealing but also strategically impactful.

Whether you’re a digital marketer aiming to maximize ROI, a small business owner striving for consistency, or simply someone passionate about visuals, the importance of photo editing can’t be overstated. With tools becoming smarter and more accessible, there’s never been a better time to take your visual content to the next level. 

Start experimenting with editing tools today, and watch how your digital presence transforms. The possibilities are endless when you combine creativity with the power of photo editing.

Categories
Photo Editing

Customer Success Stories: How Our Photo Editing Services Transformed Their Images

Have you ever thought about how powerful a single photo editing process could be? What if you could transform boring, uninteresting photos into breathtaking images that will captivate your viewers? It’s not a surprise that you’re not the only one in this thought! A lot of our customers were in the same boat before reaching out to us. With our photo editing services We’ve helped numerous clients and individuals transform their images from normal to exceptional.

This blog will guide you through actual examples and customer satisfaction stories, showing the ways our editing tools have made an impact. From before and post-edit photos to glowing customer testimonials You’ll be able to see the way professional editing can turn any photo into a visually stunning masterpiece.

Why Do Businesses and Photographers Seek Professional Photo Editing?

Before we get into our customer success stories we’ll take a moment to consider why editing photos is essential. In today’s world of visuals photographs play a crucial influence on your brand’s image. It doesn’t matter if it’s for a site or social media platform, or a catalogue of products High-quality images will determine your impression to potential buyers.

But, getting these top-quality results usually requires more than the right camera. Even the most skilled photographers require assistance with post-production. This is where professional photo editing transformations can be found. They allow for precise adjustments, improves colors, corrects lighting and removes imperfections, all that help reveal the full potential of a photo.

Case Study 1: Bringing E-Commerce Products to Life

Prior to that: An online fashion company approached us about a problem. Their product images appeared dull and lacking in vibrancy. Despite professional photography the images did not grab the attention of shoppers on the internet. The result was a decrease in conversion rates and sales overall.

After: Then we came into the picture using our highly-specialized editing and photo editing services. Our team tweaked the lighting, boosted the colors, and made sure that the product was visible against a crisp background. With precise editing we also redressed small imperfections such as wrinkles on the clothes and incorporated uniform shadows to give a refined appearance.

Effect: The result was nothing short of spectacular. The retailer experienced an immediate increase in website engagement as well as an increase of 35% in sales within the first month following the new images were made available. They will continue to work with us for all of their needs to edit their photos for the product.

This is what the client said in their testimonial:

“We were amazed by the impact professional photo editing brought to our product listing. The photographs showing the before and afte r speak for themselves. The sales on our website soared and we couldn’t be more pleased with the result!”

Case Study 2: A Real Estate Photo Makeover

Before: An agent from a real estate agency presented us with a series of photographs of the property that didn’t convey the beauty of the homes he wanted to sell. The lighting was poor and the photos didn’t convey the grandeur and elegance of the homes. Buyers weren’t impressed and the properties weren’t drawing enough interest.

After: Using our editing and photo editing tools We enhanced the natural light of the images, altered the angle to give the spaces a more open feeling, and also improved the clarity and balance of colors to show the beauty of the homes. We also utilized sophisticated techniques to simulate the properties, incorporating elegant furniture and décor to the empty areas.

Results: The agent noticed an increase in enquiries and visits. Many properties that were in the market for months were sold in a matter of weeks after the listing was updated with new pictures.

His testimonial speaks volumes:

“The difference between the before and after photos is night and day! I’m getting more calls than ever, and I’ve already sold three properties that had been sitting for months. Your team is amazing!”

Case Study 3: Enhancing Wedding Memories

Before the wedding: A photographer reached us after taking beautiful photos of the ceremony, but some of the photos had minor flaws. Some were too exposed, while others included unneeded background elements and a few were sloppy lighting due to the location. The couple were looking for the best photos, however the raw images needed to be polished.

After editing: We meticulously edited every single photo, making sure that each image in your wedding album is perfect. We adjusted the exposure, improved skin tones and eliminated any distractions from the background. We also applied subtle color grading to create a romantic romance that matched the overall mood.

Final result: Wedding couple was thrilled by the end result while the photographer managed to provide a stunning wedding photo album that was beyond their expectations. Photographer has recommended many other clients to us to edit.

Their glowing customer testimonial:

“You added even more charm to the appearance of our special day! The photo editing transformations were incredible, and every image now perfectly captures the love and joy of our wedding day. We appreciate you preserving our memories for all time.”

Case Study 4: Revolutionizing an Artist’s Portfolio

Prior to: A young artist and photographer approached us with an interesting problem. She had captured some stunning photographs of nature, but was concerned that her editing skills were not doing justice to the images. Her goal was to make her resume stand out when she applied for gallery exhibits.

After: We worked in close collaboration with the artist in order to comprehend her style and vision. We worked with each of the images and adjusted the tone for a more cohesive style across the portfolio. We improved the colors, and highlighted intricate details in the landscapes and made small adjustments to give her work a professional and polished edge.

The result: The portfolio was subsequently accepted by a number of galleries, and she even got an article in a well-known art magazine. The artist continues to collaborate with us on all of her future projects, and believes we are an integral component of her process.

Here’s what she was able to say in her review:

“I didn’t know my photos could look this good! Your team truly brought my vision to life. The before and after photos are proof of your talent and dedication. I wouldn’t have succeeded without your assistance!”

The Importance of Before and After Photos

It’s not easy to see the photos before and after to appreciate the effect that professional editing can bring to a photo. These comparisons between two photos demonstrate the skills of our editing team, but they also show how much potential a photo has with the proper focus.

When you are trying to create striking photos, our aim is to go above and beyond the basic adjustments. We strive for editing techniques that lift the image, improve the story, and ensure that it makes an unforgettable impression.

Why Our Clients Love Working With Us

We are extremely proud of the relationships we develop with our customers, and the glowing testimonials from our clients we receive prove the same. What sets us apart:

  • Customized Service: We know that each photograph is unique, and so we edit our work to meet the needs of each customer.
  • Speedy Turnaround Timelines: We understand that time is crucial especially for business. Our efficient workflow will ensure that you receive your edited images promptly, and without compromising quality.
  • Affordable Prices: We provide reasonable prices for high-quality, professional photo editing and transformations, thereby which makes our services accessible to companies of all sizes.
  • Highly skilled editors: Our team is composed of skilled editors who are specialists in their area, from retouching, to advanced photo manipulations.

Final Thoughts: Let Us Transform Your Images

If you’re a company seeking to improve your online presence, or an artist in need of professional post-production assistance we’re here to help your images shine. Our client testimonials and success stories we’ve shared offer just an example of the amazing outcomes we’ve had for our customers.

If you’re eager to see your photo editing transformation contact us now. We’ll collaborate closely with you to comprehend your goals, offer an individual solution and provide amazing results that surpass your expectations.

Remember that every good image is built on a solid foundation. However, it’s the final elements that make it shine. Let us help your photos reach their maximum potential.

Categories
Photo Editing

A Step-by-Step Guide to Outsourcing Your Photo Editing

Have you ever felt overwhelmed by the sheer volume of photos that need to be edited? Are you spending more time perfecting images than running your photography business or focusing on other creative work? If so, you’re not alone. Photographers and businesses frequently get swamped in the photo editing process, often unable to keep up with the demand for professionally photographed high-quality images. But there’s a silver lining to it: there’s a solution that frees up your time, increases the productivity level, and produces amazing work results. Guess what? Outsourcing photo editing.

In this friendly guide, I will take you step by step through the process of outsourcing from finding a suitable editing service to its inclusion in your workflow. Whether you are among those professional photographers or if you only manage an e-commerce store, this guide to outsourcing will make you realize exactly how it is possible for you to outsource your photo editing in the most efficient and cost-effective manner without the stress.

Why Outsource Your Photo Editing?

Before we dive into how to outsource, let’s first take a look at why you would want to outsource your photo editing in the first place. If you’re in any of the following situations, outsourcing could be just what you need:

  1. Time-Consuming: The process of photo editing is very time-consuming, and when you have a huge pile of images then it’s even worse. By outsourcing post-production tasks, you’ll again be able to focus on your key business activities, leaving the pros to do all the rest.
  2. You want to scale your business: Because outsourcing helps you work on more projects without worrying about the editing backlog, it becomes very useful when you run an e-commerce shop or have a volume photography studio.
  3. You Are Looking to Reduce Expenses: In-house team assignment for photo editing is costly. To outsource is to reduce overheads and get the work of high-quality editing done.
  4. You Require Specific Skills: Professional editing companies can offer specific skills as well as specializations that you might not have in-house. Anything from retouching to advanced colour correction, outsourcing gives access to the best tools and techniques to go with them.

Step 1: Assess Your Photo Editing Needs

Any outsourcing guide starts with knowing exactly what you need. Do you require basic edits such as cropping and color correction, or are you looking for detailed services like retouching, background removal, and image manipulation? To get maximum benefits received from outsourcing, you would need to have a precise idea of what might be necessary in terms of editing requirements for your photographs.

Questions to Ask Yourself:

  • How many do I need to retouch daily/weekly?
  • How much editing should I do to my photos?
  • Are there certain styles or norms I’d like to maintain throughout the images?

Once you answer them, you would know better about your requirements so that you can make the right choice about the editing services provider.

Step 2: Research and Choose the Right Editing Services Provider

You have determined your needs, it is now the time to find that ideal outsourcing partner. There are so many photo editing companies out there. However, not all can provide a quality and efficient service. Thus, finding the right one is of paramount importance. Here’s how you can outsource your photo editing successfully, select a trustworthy provider:

  1. Check Their Portfolio: These companies usually offer a portfolio of their previous work, thus you are able to check out whether they specialize in the type of photography you specialize in. It may be product photos, wedding photography, or even real estate images, and so on; they must have worked with such themes within the specific area.
  2. Look for Testimonials and Reviews: Testimonials and reviews from other clients can give you insight into the dependability and quality of your editing services. Find sites such as Trustpilot or Google Reviews to know what users think.
  3. Ask them about their Turnaround Time: Most businesses are time-sensitive. Ask the potential providers how they can make edits in your timeline.
  4. Understand Their Pricing: Outsourcing photo editing does not come cheap, but the prices will vary. Some charge per image, some charge an amount per package, and there may be others who bill more inexpensively than others. This can get rather confusing, so it’s good to understand the pricing structure before contracting with them so that you avoid surprises later on.
  5. Ask for a Trial: Most the companies that offer photo editing services will give you a free trial with potential clients. Take up the opportunity and send a few images to be edited and evaluate the kind of work they do before committing to them.

Step 3: Clearly Communicate Your Vision and Expectations

Good communication is what makes the photo editing process work. Once you’ve settled on an editing partner, outline your detailed expectations. Remember, they are not likely to know your brand or style at least not well, so guidelines need to be provided.

What to Include in Your Instructions:

  • Editing preferences (e.g. color tones, brightness, contrast)
  • Specific tools or software you prefer for the edits
  • Examples of images you’re comfortable with that have already been edited
  • Deadlines for when you need the images back

The more detailed your instructions, the smoother the step-by-step process of outsourcing will be.

Step 4: Submit your photos and get started

With all this in check, submit your photos to a provider of your choice. This can all happen across multiple volumes, and, for the smooth transfer of files, you’re welcome to use Dropbox, Google Drive, or even WeTransfer.

Most professional editing services providers will have a streamlined process in place for gathering and returning your images, but at least make sure to ask them about their upload/download flow. What is clear at this point will save your behind when preventing hiccups.

Step 5: Reviewing the Edited Photos

The moment you get the edited pictures back, that’s the right moment to go through them with a magnifying glass. Check the photos edited against your original files, and check if they live up to your expectations. If modifications or changes are needed, do not fail to give feedback.

What to Look For:

  • Is the color okay and uniform?
  • Is there a well-defined set of facts?
  • Does it include any of your particular instructions?

It ensures that the final product shall come out according to your vision, and moreover, it helps in creating a more fluent workflow that could also be materialized in some future collaboration with your outsourcing partner.

Step 6. Seek Feedback and Act Accordingly

A successful collaboration only needs the essential feedback. Do not get disappointed if the first set of revisions does not live up to your expectation. Instead, provide positive and negative feedback on what you like and what should improve. The bottom line here would be that the two parties concerned must be able to agree on the style or taste about the editing.

When providing feedback:

  • Be clear on what has to be changed (for instance, “Please dim the brightness on the skin of the product”).
  • Use visual markers to highlight areas of the image that require correction.
  • Acknowledge what worked well to encourage consistency in future edits.

By building a good working relationship and communication, it will help keep the photo editing process smooth for the long term.

Step 7: Building a Long-Term Relationship

Once you have identified a reliable outsourcing company that always delivers good quality, consider a long-term partnership. To the benefit of both parties, you will then have an editor available for your all projects, while they will become more familiar with your style, thus speeding up the entire photo editing process.

Additional advantages of long-term relationships with editing services can also include the following:

  • Mass offers discounts or credit for repeat business
  • The return would be faster because your needs would be more predictable
  • It’s much more personal when they already know your brand

Bonus Tips on Efficient Outsourcing of Photo Editing

  • Automate Where Possible: Quite a few companies allow their clients to automate delivery; their goal is to deliver edited images faster. This can be very helpful for the e-commerce business who carries a tremendous volume of photos.
  • Monitor Quality Control: Even when outsourcing, you would like the quality for your images maintained. Implement a check system for proper control of edits before publishing them on your site or to the client.
  • Edit it following the latest photo editing trends: Photo editing trends always change. Keep yourself updated on the latest techniques and tools that your provider is using and do not be hesitant in asking for specific styles, if you have seen them trending recently.

Conclusion: How Outsourcing Adds to the Power of The Workflow with Photo Editing

Outsourcing photo editing can be a business game-changer. Not only will you save time, but you will also provide your clients or customers at large with premium levels of quality images. Just follow these step-by-step outsourcing guides and you’ll be all set towards finding the perfect editing services provider who can catapult your visual content to the next level.

Keep in mind that the success of outsourcing relies on both parties clearly communicating, regular feedback, and a true understanding of what it is you do business by the provider. Once you get outsourcing working for you within your workflow, you’ll ask yourself how you survived so long without it!

Categories
Photo Editing Photography

The Importance of Photo Editing in E-commerce and Product Photography

What makes the world of e-commerce tick is the enormity of the importance of first impressions. Now that more people shop online, appearance translates into being a top priority for selling items. Customers cannot possibly feel or try out the products they see online, thus making great images indispensable in the decision-making process.

And this is where e-commerce photo editing becomes so important. With high-quality product images, businesses can be sure to present their offerings in the best light and therefore earn more clicks, engagement, and ultimately, conversions.

This article goes on to explore why photo editing is an absolute must-have for any e-commerce or product photography site and how current e-commerce trends shape the visual representation of online shopping.

Why High-Quality Images Matter in E-commerce

In a world dominated by online shopping, the images on your website are often the only way customers can judge your products. When shopping online, consumers rely on online store images to make purchasing decisions, which means low-quality or unedited photos can lead to poor impressions, decreased trust, and lost sales.

A study by MDG Advertising found that 67% of consumers consider clear, detailed images to be more important than product information, reviews, or even the price. The photos you use on your online store are a direct reflection of your brand’s quality and professionalism, making product photography one of the most critical aspects of e-commerce.

Why High-Quality Images Matter in E-commerce

An image-rich online shopping world is where the pictures on your website are actually the only way your customers can decide if they want to buy from you or not. With consumers shopping online, they have to make decisions based on online store images, and low quality, unedited photos lead to poor impressions, mistrust, and lost sales.

According to an MDG Advertising research, 67% of consumers say that clear, detailed images are more important than product information, reviews, or even the price. The quality of photos you are going to use on your online store is a direct reflection of the overall quality and professionalism of your brand, which makes product photography a most important aspect of e-commerce.

What is E-commerce Photo Editing?

E-commerce photo editing is associated with the post-production enhancement of product images for better vision and ready-to-be-presented images that appeal more to buyers in the market. This includes such things as color correction, background removal, sharpening of images, and lighting enhancement. Professional ecommerce photo editing can allow businesses to put forth polished, attractive presentations of products, which means that chances of a sale will be increased.

The more crucial it is to make sure that product images are enhanced with proper editing, either by using in-house teams or by hiring specialized companies. Well-edited images enable the customers to see the product details, examine the texture and colors, look at dimensions, and ascertain confidence about purchasing the product.

How Photo Editing Adds Value to Product Photography

  1. Consistency across product listings: Consistency helps build credibility for a professional online store. Image editing, for instance, means that each of your product photos has a consistent style that leaves the shop looking smooth to browse through for your customers.
  2. Highlighting Key Product Features: Through editing techniques such as zooming in on all the crucial details or focusing on the textures of the products, you highlight and underscore their key product features. This sells the product. Whether it is a precise design on a jewelry piece or a good finish of any gadget, enhancing product photos has helped bring out features that make your products exceptional.
  3. Removing the background for neater images: Background removal or replacement of background is one of the most frequent jobs of photo editing in e-commerce.
  4. Color Balancing for an Authentic Appearance: Color is one of the main factors when making a purchasing decision. Consumers want to see a product online that will look the same in their hands.
  5. Retouching and Smoothening: Each of the dust particles, smudges, or minor manufacturing defects would easily draw much attention when they appear in product photographs. With the techniques of advanced product photography editing, these imperfections can be easily retouched and would allow an image to leave perfect

That has changed the dynamics of how product presentation and e-commerce photo editing are managed. Keeping abreast of such trends can help businesses stay more competitive as well as appealing to modern consumers. Some of the key e-commerce trends that are influencing photo editing today are:

  1. Interactive and 360-Degree Photos: Arguably the hottest e-commerce trends in recent times is the increased adoption of more interactive and 360-degree product photos. This will be how customers get to view various angles of products, the closest possible experience in a physical store.
  2. Lifestyle and Contextual Images: Lifestyle images, that pose the product in a real-world setting, are yet another growing trend in product photography. This calls for more sophisticated manipulation as both the product and the environment have to be manipulated carefully to look aesthetically pleasing.
  3. Augmented reality is changing the face of e-commerce trends: More retailers now come offering virtual try-on features for clothes, accessories, and even furniture.
  4. Mobile Optimization: Now that consumers are increasingly coming in on mobile, product photos have to be optimized for smaller formats, too. This means image resizing and editing for good clarity and details when viewed on mobile.
  5. E-commerce trends remain minimalist: Clean images of products with generous quantities of white space make the focal point the product in particular, giving out a sleek modern outlook that turns today’s consumer on.

Role of Professional Photo Editing in E-commerce

Professional ecommerce photo editing is probably one of the best investments you can make for your online store. It doesn’t just make your site look better-it also impacts your bottom line. Here’s how:

  1. Conversion Rates: Research findings suggest that high-quality images of the products are one of the ways of achieving a high conversion rate. Good quality images ensure customers make the sale because they feel and are assured of confidence, thus high sales, and fewer cart abandonment.
  2. Lower Return Rates: For a customer, the main reason for return is that the product does not match the online description or image. Products with accurate, well-edited, images create the right kind of expectation and thereby help cut down returns.
  3. This will improve brand perception: The quality of the images on your online store reflects the level of professionalism of your brand. Good editing of photos shows you care for your products and the customer’s experience while shopping, which enhances trust and lays a foundation for brand loyalty.
  4. SEO Benefits: Believe it or not, photo editing can be useful also to your efforts on search engine optimization. Search engines are known to favor sites which have a smooth and fast user experience, and optimized images contribute to faster load time.
    And besides, well-edited pictures that look awesome are also more likely to get shared on social media, thus driving organic traffic to your website.

Conclusion

In the highly competitive world of online retail, standing out is everything. Professional ecommerce photo editing is the key to ensuring your product photography lives up to the high standards consumers expect when shopping online.

This may mean online image enhancements for better online store images, optimizing images for mobile devices, or catching emerging e-commerce trends by staying ahead of what others are doing. Such investments in photo editing can transform the visual appeal of your store and possibly even the bottom line.

It is because image curation on your website is not merely how to make a shopping experience interesting, but it also provides a sense of credibility and trust by the audience. Ultimately, fabulous images will lead to fabulous results-and clearly, there can be no greater statement than that in terms of e-commerce photo editing.

Categories
Photo Editing

Understanding Different Photo Editing Styles: Which One is Right for You?

In the photography world, taking an amazing shot is only the beginning. The real magic happens during the process of editing, where photographers can improve, alter or completely alter their photographs. The editing style you select will have an impact on the final product in terms of how it will be seen by the public. No matter if you’re a pro photographer enthusiast, or who is new to editing, knowing the various editing techniques is crucial in helping you to create your own distinctive style.

This article will go over the different styles of photo editing and methods, assisting you to determine the one that is most compatible with your vision of art and objectives. If you’re looking for traditional editing, something more contemporary or even more custom-designed approaches There’s a style suitable for you.

What Are Photo Editing Styles?

Before exploring the various styles, it is essential to know what we refer to as “photo editing styles.” The essence of an editing style describes the mood, tone and impression you wish your images to convey following post-processing. It is the process of using different editing techniques like adjustment of exposure, color correction sharpness, contrast cropping, and many more. The style you select should reflect the style of photography you’ve chosen and the message you wish to convey.

1. Classic Photo Editing Style

The traditional editing style is simple and elegant with a focus to make the photo appear natural and refined. It’s all about small tweaks that improve the image, without drastically altering how it appears. The objective is to keep the authenticity of the original image while also changing the color balance, exposure, and sharpening fine details.

Editing Techniques:

  • Correction of colors to make the image more similar to how it would appear in real life.
  • White balance adjustments are made to ensure the appearance of colors is natural and accurate.
  • Correction for exposure to reduce or lighten the brightness of the image to the correct degree.
  • A slight sharpening to improve your subject but without introducing fake.

This design is great when it comes to professional headshots and product photos or any other genre where authenticity is essential. If you’re looking for authenticity and want to preserve the essence of the photo it might be the best design for your needs.

When to Choose This Style:

  • You need professional and clean images.
  • Your goal is to make the image as true to life as you can.
  • Your work is focused on photographs or events that require a natural, polished finish.

2. Vintage or Film-Inspired Style

Influenced by the look and feel of film photography from the past The vintage editing style is incredibly popular because of its warm, nostalgic appeal that is timeless. This style is perfect for photographers who want to create an atmosphere of historical significance and warmth or beautiful atmosphere in their photographs.

Editing Techniques:

  • Colors faded to resemble the appearance of old photos.
  • The use of decolorization or muted colors can give a retro feel.
  • Vignette effects are used to draw attention towards the center of the image.
  • Soft grain to mimic the film’s texture.

This type of style is ideal in weddings and lifestyle photos as well as portraits. It gives a warm, vintage feel and adds an emotional dimension to your photos. If you love making use of nostalgia or romantic, dreamy scenes this style could be ideal for you.

When to Choose This Style:

  • You’re looking to evoke memories or feel a sense of inevitability.
  • You’re working with topics related to lifestyle, romance or emotional storytelling.
  • You’d like your photos to be soft and dull, with a film-like look.

3. High-Contrast and Dramatic Style

The editing style of high-contrast is about creating striking stunning images that draw the attention of viewers. This type of editing is popular when it comes to fashion photography, stunning portraits and in editorial work where an impression of tension or mood is required. It’s about creating strong contrasts between dark and light parts of the image and often results in vibrant and eye-catching images.

Editing Techniques:

  • Massive contrast adjustments to create stark contrasts between dark and light zones.
  • Color enhancements that are selective or high-saturation enhancements to add drama.
  • The deep shadows and highlights improve the mood of the photograph.
  • Sharpening and clarity to bring out the subject.

This design is great for photographers who want to create dramatic dark and moody images that are distinctive. It’s great for photography in low light or creating a sense of mystery and fascination.

When to Choose This Style:

  • Your work is based on the fashion industry, dramatic portraits or high-quality photography.
  • You’re looking to stand out by using your photos.
  • You are drawn to powerful lighting effects as well as a high contrast in your photos.

4. Minimalist and Light Airy Style

Minimalist editing of photos is all about elegance and simplicity and focusing on light, clear, and bright photographs. The airy, light-colored style is popular for lifestyle shoots, weddings as well as travel photography. It is often characterized by soft pastels, bright colors, and high-exposure to create a clean airy look.

Editing Techniques:

  • High-exposure and brightness provide the image with a clean, bright and clear appearance.
  • Soft shadows and subtle contrast adjustments to keep an even tone.
  • Slight desaturation for a subtle, pastel effect.
  • Warm tones that create the feeling of a warm, cozy environment.

This design is ideal for those who want clear, vibrant photographs with minimal distractions. It’s great in settings that have natural light, which makes it an ideal choice for outdoor shooting and light interiors.

When to Choose This Style:

  • You’re looking for a soft, warm, and elegant touch.
  • Your photography style is focused on weddings, travel or lifestyle images.
  • You love working with natural shades of light and subtle colors.

5. Black and White Photo Editing Style

A popular and traditional style and timeless is photography in black and white. The removal of color from an image will add beauty, drama and emotion that often is lost in photography. Images in black and white are focused on texture, contrast, and light, which makes them perfect for street photography, portraits, as well as fine art.

Editing Techniques:

  • High contrast adjustments that emphasize patterns and textures.
  • Grayscale conversion to eliminate any color and focus on shadows and light.
  • Clarity and sharpening to bring out particular details, particularly in portraiture.
  • Adjusting the tone of the selected image to achieve an even balance between highlights and shadows.

Editing in black and white can make your photos more appealing by transforming a basic image into something incredibly powerful. If you are a fan of moody, beautiful, timeless, or classic photos, this style is one to try.

When to Choose This Style:

  • You should highlight texture, light and shadows.
  • You are a fan of working in a timeless, traditional design.
  • Photography is about dramatic portraiture streets, urban scenes or high-quality art.

6. Artistic and Creative Editing Style

If you’re a photographer looking to go beyond the limits of editing in the traditional way and editing, a creative or artistic style might be the best option. It can encompass a broad variety of customized photo editing techniques, ranging from conceptual and surreal edits as well as digital editing techniques that make totally new possibilities. This style encourages experimentation and gives total creative freedom.

Editing Techniques:

  • Advanced layering, masking tools to blend multiple images, or to add extra effects.
  • Surreal color grading that creates the most dreamy or magical setting.
  • HDR (High Dynamic Range) effects that create realistic or fantasy-like images.
  • Compositing is the process of combining multiple images into one frame.

Creative editing is a great option for photographers who are fine art as well as commercial artists or anyone who wants to push the limits of manipulation in photos. If you’re interested in creating unique visual stories, this method allows you to fully showcase your creativity.

When to Choose This Style:

  • You like photos that are surreal or conceptual.
  • You’re looking to test the limits of editing methods.
  • You’re interested in designing individual, unique images that tell an original story.

7. Moody and Desaturated Editing Style

Moody editing is becoming a fad in recent times, particularly for photographers who shoot portraits and lifestyle. This type of editing involves using subtle colors, dark shadows and cool tones that create a sense of mystery, emotion, or sadness. It is often employed in stories in which the focus is on creating a mood that is more than the subject matter of the photograph.

Editing Techniques:

  • Desaturated colors create a subdued, muted palette.
  • cool tones of the shadows and highlights to create a moody look.
  • The contrast is strong to emphasize the shadow and light play.
  • Texture and grain to give an organic, film-like look.

This type of photography is perfect for photographers who wish to tell a story with their photos. It’s great for urban landscapes, portraiture and lifestyle photography with the aim of creating emotion and a sense of the feeling.

When to Choose This Style:

  • You’re trying to create emotionally charged pictures that are atmospheric, emotional.
  • You favor cool, muted colors.
  • Your photography is about telling stories and emotional images.

Choosing the Right Photo Editing Style for You

With a myriad of photo editing styles available How do you decide which one is best for you? Here are some tips to help you choose:

  1. Take a look at your photography style Editing your photos should match your style and the photography that you use. For instance, if you shoot lifestyle or wedding photos with a lighter and airy style may be better. For striking portraits, high-contrast editing can create a dramatic impact.
  2. Think about Your Target Audience Who are you making this content for? Consider your audience’s preferences. If you’re performing commercial work choosing a classic, clean style could appeal to customers as opposed to an innovative, creative method.
  3. Try experimenting with different styles It’s not necessary to adhere to a single editing style. It is okay to experiment with various looks until you come across one that best fits your artistic vision.
  4. The importance of customization is to not resist engaging in custom editing of your photos to mix styles or to add your own personal touch. Customizing your editing style will allow you to make yourself stand out and enhance your unique voice.
  5. Be True to Your Vision at all times, the ideal style of editing photos is the one that is in line with your artistic objectives. If it’s classic or moody or even experimental The right style can improve the story you want to convey.

Conclusion

Making the right choices and identifying the most appropriate techniques for editing photos is vital for photographers who want to improve their post-processing. From classic and timeless designs to striking, creative styles, there’s a wide range of editing techniques that you can explore. 

If you’re drawn to vibrant photos, vintage influences, or eerie atmospheres The style you pick will enhance your photography and help you more effectively connect with your viewers. If you’re willing to experiment and stay in the direction you want to go You’ll discover techniques to edit your photos that will not only make your images more vibrant but also boost your artistic voice.

Categories
Photo Editing Photography

How Outsourcing Photo Editing Can Save Your Photography Business Time and Money

In today’s digitally-driven world photographers are increasingly dependent on professional editing services to remain competitive and improve their workflow. With increasing demands from customers who demand high-quality photos within a short time frame, managing the post-production workflow can be difficult for photographers.

One method that has proven to be revolutionary is outsourcing editing of photos. When editing tasks are delegated photographers can concentrate on their strengths to increase efficiency and dramatically reduce time and costs. Let’s look at the ways outsourcing will benefit your company.

The Hidden Costs of In-House Photo Editing

For many photographers it is tempting to handle editing on-site may seem appealing initially. However, having an in-house team, or even editing images by yourself can have substantial hidden costs. They include:

  1. Time Investment: Editing photos is a laborious process that can take a long time or even days for large quantities of photos. If you’re spending most of your time editing your photos, you’ll have less time to devote to more important tasks such as client meetings, marketing, and taking photos – tasks which directly impact your earnings.
  2. Costs for equipment and software: The most advanced photo editing software requires sophisticated software such as Adobe Photoshop or Lightroom along with the equipment needed to operate these programs effectively. Continuous updates and the release of new versions will result in ongoing costs for your business.
  3. Training and expertise: editing can be a fine art in and of itself. To guarantee quality and consistent results, you and your team require training. This is costly in terms of cost and time. Additionally, acquiring advanced skills is a continuous process that doesn’t ever end.
  4. Labor Costs: Labor Costs hiring experienced photo editors or keeping a staff of professional in-house employees will increase your payroll costs in particular if you require specific skills such as retouching color correction as well as background elimination.

How Outsourcing Photo Editing Saves Time and Money

When you outsource photo editing it is possible to avoid a lot of the above-mentioned costs as well as gain several important advantages:

1. Immediate Access to Expertise

Outsourcing lets you connect with a group of experienced experts who specialize in editing photos. This means that you don’t have to spend time training or managing an internal team. Their expertise means that these experts can handle all types of editing including basic color correction to sophisticated editing. It ensures that your photographs have the highest quality standards each time without a hitch or a problem.

When selecting an editing company check out portfolios and reviews to make sure they have the ability to meet your needs. This ensures that your photography business will benefit from top quality editing.

2. Quick Turnaround Time

One of the main outsourcing advantages is the speed with which work can be accomplished. Professional editing firms typically employ large teams that work in shifts, delivering rapid results. This means that you can keep to tight deadlines and not compromise what you do. This means that your company will increase customer happiness and retention.

The ability to cut down on time and costs through faster turnaround times directly translate into greater efficiency, allowing you to complete many more photography projects, and also generate more income.

3. Scalability for Your Business

Outsourcing lets you scale your photography business faster. If you’re dealing with a huge amount of work, particularly during busy times like weddings or holiday events, outsourcing can help you to handle the load without the need for additional hiring. No matter if you require hundreds or just a few photos edited, outsourcing companies can be flexible to meet your demands.

When you outsource your photography, your business is able to grow and adapt and gives you the benefit of focusing on more important tasks such as customer acquisition and growth of your business.

4. Cost-Effective Photo Editing

Outsourcing is well-known for its efficiency in cost. When you consider the cost of hiring an internal team to outsourcing, the distinction is apparent. When you outsource, you save the costs of hiring software, training hardware, office space.

Furthermore, many outsourcing companies provide price plans which are less expensive than sustaining an internal team. The only cost you pay for is the services you require them, which makes it an affordable solution. This lets you keep more money from each undertaking, and contribute to the sustainability of your company’s business over time.

5. Focus on Core Business Functions

Outsourcing lets photographers focus on what they excel at: capturing stunning moments. Instead of slaving away in front of a computer screen, editing photos, you can concentrate your efforts on growing your company, networking and improving your photography.

By entrusting post-production work to an experienced service You can be sure that your clients get their edited images faster, without sacrificing quality. This improves the overall efficiency of your business and lets you keep your creativity.

6. Consistent Quality

A consistent quality for your photos is vital to establish a trustworthy brand. Outsourcing will ensure that your edited photos are handled by professionals who are skilled in ensuring a consistent design and high quality. A consistent quality enhances your portfolio as well as strengthens the relationships with your clients in the long run, making sure that your work is noticed in a highly competitive marketplace.

7. Reduce Stress and Workload

A photography business is a venture that has its fair amount of stress: managing clients planning shoots, marketing and much more. outsourcing editing of photos can dramatically decrease your workload, freeing your time and energy. With a lower workload, you’ll have a better lifestyle, which is vital to long-term success for any business.

Photography Business Tips for Choosing the Right Outsourcing Partner

We’ve now identified the advantages outsourcing can bring. Let’s examine some suggestions to make sure you choose the best outsourcing partner.

1. Review Samples and Portfolios

It is the first thing reviewing the portfolios of potential outsourcing partners. You should look at their style, consistency in addition to editing and style. The portfolio of the photographer should show the kind of work that you’re looking for from the photography company you run. If you’re planning to shoot weddings, make sure the editing service you choose is specialized in editing wedding photos.

2. Start Small

Start with a few small batches of photos to see how it goes. This will allow you to assess the quality of their work, the turnaround time and whether the style corresponds to your expectations. It’s a good idea to determine if they’ll be able to meet your requirements before you commit to bigger projects.

3. Communication is Key

When outsourcing the work, it is essential to communicate clearly. Make sure you are able to effectively convey your ideas and feedback to the team who will be editing. If you can, select collaborators who provide an open line of communication and dedicated project managers to ensure your specific requirements are met.

4. Evaluate Turnaround Time

The importance of time is paramount in the business of photography. It is important to ensure that the outsourcing firm gives clear timeframes for the delivery of edited photos. Set deadlines in advance and ensure that they are able to adhere to those deadlines without having to rush through the editing.

5. Cost Transparency

Cost transparency is vital. Find out pricing plans and any additional charges for rush orders, or any specific editing specifications. This will help you control your budget and prevent unplanned costs later on.

Conclusion: Investing in Outsourcing to Drive Business Efficiency

In the end outsourcing photo editing has numerous benefits that will help your photography business save cash and time. By removing the need for expensive in-house resources you have access to expert editing services that can boost the efficiency of your company, guarantee regularity, and enable you to concentrate on more important business tasks. Scaling your operations easily, meeting deadlines on time and enhancing your client satisfaction are crucial to increasing the success of your company.

Outsourcing isn’t only about making money, it’s an effective strategy to increase efficiency in your business and give more efficient service to your customers. If done properly outsourcing is a powerful resource that will take your business in photography to a new step.

Categories
Photo Editing

Common Photo Editing Mistakes and How to Avoid Them

Basic Photo Editing Mistakes and Simple Fixes

Photo editing is a powerful tool that can transform an ordinary image into an extraordinary one. With the increasing accessibility of editing software, more people are delving into the world of photo enhancement. However, even the most enthusiastic amateur photographers can fall prey to common editing mistakes. These errors can detract from the overall quality of the image and undermine the photographer’s original vision. In this article, we’ll explore some of the most frequent photo editing mistakes and provide straightforward solutions to avoid them. By understanding and addressing these issues, you can ensure that your photos always look their best and accurately reflect the moments you intended to capture.

Section 1: Over-Editing

One of the most prevalent photo editing mistakes is over-editing. This occurs when too many adjustments are made to an image, resulting in an unnatural or unrealistic look. Over-editing can include excessive use of sharpening, contrast, or saturation tools, which can distort the original intent of the photo. To avoid editing errors, it’s crucial to maintain a balance and enhance the photo while preserving its natural essence.

Pitfalls of Over-Editing:

  • Loss of Detail: Over-editing can cause details in the image to be lost, especially when using tools like sharpening or clarity excessively.
  • Unnatural Appearance: Images can end up looking overly processed or fake, which can detract from their appeal.
  • Viewer Distraction: The goal of a photo is often to convey a message or emotion. Over-editing can distract viewers from this message.

Tips for Maintaining a Natural Look:

  • Use Subtle Adjustments: Make small, incremental changes rather than drastic ones. This helps in preserving the natural look of the photo.
  • Check Before and After: Always compare the edited photo with the original to ensure that the changes enhance rather than overpower the image.
  • Avoid Extreme Settings: Be cautious with sliders and settings in your editing software. Avoid pushing them to their extremes.

By being mindful of these tips, you can avoid the common photo editing mistakes associated with over-editing and maintain a natural, authentic look in your images.

Section 2: Ignoring the Original Quality

Another common photo editing mistake is ignoring the original quality of the image. Starting with a low-quality image makes it challenging to achieve a high-quality final product, regardless of your editing skills.

Importance of Starting with a High-Quality Image:

  • Editing Flexibility: Higher-quality images provide more data to work with, allowing for better adjustments.
  • Professional Results: High-resolution, well-lit photos look more professional and polished after editing.

Tips on Ensuring Good Original Quality:

  • Proper Lighting: Ensure your photos are taken in good lighting conditions. Natural lighting is frequently the best option.
  • High Resolution: Use a camera with a high resolution to capture more detail.
  • Steady Shots: Use a tripod or stabilize your camera to avoid blurriness.

By starting with a high-quality image, you can minimize the photo editing mistakes that arise from trying to fix fundamental issues, making the editing process smoother and more effective.

Section 3: Overuse of Filters

The overuse of filters is a frequent photo editing mistake, especially with the prevalence of social media apps that offer a variety of filter options. While filters can enhance an image, using them excessively can result in an artificial look.

Common Mistake of Overusing Filters:

  • Loss of Originality: Filters can sometimes overshadow the original elements of the photo, making it look generic.
  • Unrealistic Effects: Overusing filters can create unrealistic colors and tones, detracting from the photo’s natural beauty.

Tips on Using Filters Subtly and Effectively:

  • Choose the Right Filter: Select a filter that complements the image without drastically changing its appearance.
  • Adjust Intensity: Most editing software allows you to adjust the intensity of filters. Use this feature to apply filters more subtly.
  • Combine with Other Adjustments: Instead of relying solely on filters, combine them with other edits like brightness, contrast, and color correction for a balanced look.

By using filters sparingly and thoughtfully, you can avoid one of the most common photo editing mistakes and enhance your images in a more natural and appealing way.

Section 4: Incorrect Cropping

Incorrect cropping is another photo editing mistake that can significantly impact the composition and focus of your image. Poor cropping can cut out essential elements or create awkward framing.

Impact of Poor Cropping:

  • Loss of Context: Important parts of the image may be lost, affecting the overall story or message.
  • Unbalanced Composition: Cropping can throw off the balance and symmetry of the photo, making it less visually appealing.
  • Reduced Resolution: Over-cropping can reduce the image’s resolution, leading to a lower-quality final product.

Tips on Proper Cropping Techniques:

  • Maintain Key Elements: Ensure that the main subjects and important elements remain within the frame.
  • Follow Composition Rules: Use rules like the rule of thirds to guide your cropping and enhance the photo’s balance.
  • Check Resolution: Be mindful of how much you crop to avoid reducing the image’s resolution excessively.

By following these tips, you can avoid the photo editing mistakes related to incorrect cropping and maintain the integrity and impact of your images.

Section 5: Poor Color Correction

Poor color correction is a common photo editing mistake that can result in unnatural-looking images. Over-saturation, incorrect white balance, and inconsistent tones are typical errors that can detract from your photo’s appeal.

Common Editing Issues:

  • Over-Saturation: Excessively increasing saturation can lead to unrealistic and harsh colors.
  • Incorrect White Balance: Failing to adjust white balance correctly can result in images with unnatural color casts.
  • Inconsistent Tones: Inconsistent color tones can make an image look unprofessional and poorly edited.

Tips on Achieving Natural Color Correction:

Mass Image Compressor Compressed this image. https://sourceforge.net/projects/icompress/ with Quality:80
  • Use Reference Points: Use neutral colors like white, gray, or black in the image as reference points to adjust white balance.
  • Adjust Incrementally: Make small adjustments to saturation, contrast, and brightness to achieve a balanced look.
  • Check Skin Tones: When editing photos of people, ensure that skin tones look natural and consistent.

By focusing on natural color correction, you can avoid common photo editing mistakes and enhance your images’ visual appeal.

Section 6: Neglecting Image Resolution

Neglecting image resolution is a photo editing mistake that can affect the quality of your photos across different platforms. Maintaining the appropriate resolution is crucial for preserving the image’s clarity and detail.

Importance of Maintaining Resolution for Different Platforms:

  • Print vs. Digital: Different platforms require different resolutions. High resolution is needed for print, while web images need to be optimized for faster loading times.
  • Quality Retention: Maintaining resolution ensures that your images retain their quality when viewed on various devices.

Tips on Resizing and Exporting Images Without Losing Quality:

  • Use Proper Dimensions: Set the correct dimensions based on where the image will be used (print, web, social media).
  • Export in the Right Format: Choose formats that preserve quality, such as PNG for web and TIFF for print.
  • Check Resolution: Ensure that you are exporting images at the correct resolution (e.g., 300 dpi for print).

By maintaining the appropriate resolution, you can avoid the photo editing mistakes related to image quality and ensure your photos look their best across different platforms.

Section 7: Overlooking Details

Overlooking small details is a photo editing mistake that can detract from the overall quality of your image. Blemishes, distractions in the background, and other minor issues can impact the viewer’s experience.

Common Overlooked Details:

  • Blemishes and Imperfections: Small blemishes on subjects can be distracting if not corrected.
  • Background Distractions: Unwanted objects or people in the background can take focus away from the main subject.
  • Inconsistent Edits: Inconsistent editing, such as uneven lighting or color correction, can make the photo look unprofessional.

Tips on Meticulous Editing and Final Checks:

  • Zoom In: Zoom in on different parts of the image to spot and correct small details.
  • Use Spot Healing: Utilize tools like the spot healing brush to remove blemishes and imperfections.
  • Review and Refine: Take time to review your edits and make final adjustments to ensure consistency and quality.

By paying attention to these details, you can avoid common photo editing mistakes and ensure your images are polished and professional.

Conclusion

Avoiding common photo editing mistakes is essential for producing high-quality images that accurately convey your intended message and emotions. By being mindful of over-editing, starting with high-quality images, using filters subtly, cropping correctly, achieving natural color correction, maintaining resolution, and paying attention to small details, you can enhance your photos effectively. Remember, the key to successful photo editing is to enhance the image without detracting from its original essence.